Overview
Breakout Rooms allow you to split your Zoom meeting in up to 50 separate sessions. The meeting host can choose to split the participants of the meeting into these separate sessions automatically or manually, and can switch between sessions at any time.
- Up to 50 breakout rooms can be created
- Max 200 total participants across all breakout rooms (requires Large Meeting 200 add-on)
- Breakout room participants have full audio, video and screen share capabilities
If the meeting is being cloud recorded, it will only record the main room, regardless of what room the meeting host is in. If local recording is being used, it will record the room the participant who is recording is in. Multiple participants can record locally.
This article covers:
- Enabling Breakout Rooms on Your Account
- Enabling Breakout Rooms for a Group
- Enabling Breakout Rooms for Your Own Meetings
Learn how to manage breakout rooms.
Prerequisites
To manage breakout rooms as the host
- Zoom account
- Zoom desktop client
Note: Users joined into the Zoom meeting from the Zoom Desktop Client, Zoom Mobile App, or H.323/SIP devices can participate in breakout rooms. Users joined via the web client and Zoom Rooms are unable to join Breakout Rooms, but the main room can be used as an alternative session for these users.
Enable Breakout Rooms on Your Account
To enable the Breakout Room feature for all members of your organization:
- Sign in to the Zoom web portal as an administrator with the privilege to edit account settings.
- Click Account Management > Account Settings.
- Navigate to the Breakout Room option on the Meeting tab and verify that the setting is enabled.
If the setting is disabled, click the toggle to enable it. If a verification dialog displays, choose Turn On to verify the change.
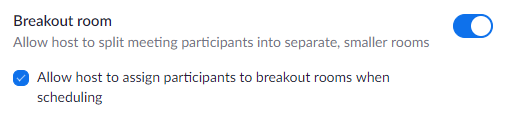
- (Optional) Click the checkbox to allow meeting hosts to pre-assign participants to breakout rooms.
- (Optional) If you want to make this setting mandatory for all users in your account, click the lock
 icon, and then click Lock to confirm the setting.
Enable Breakout Rooms on a Specific Group
To enable the Breakout Room feature for all members of a specific group:
- Sign in to the Zoom web portal as an administrator with the privilege to edit groups.
- Click User Management > Group Management.
- Click the name of the group, then click the Settings tab.
- Navigate to the Breakout Room option on the Meeting tab and verify that the setting is enabled.
If the setting is disabled, click the toggle to enable it. If a verification dialog displays, choose Turn On to verify the change.
Note: If the option is grayed out, it has been locked at the account level, and needs to be changed at that level. - (Optional) Click the checkbox to allow meeting hosts to pre-assign participants to breakout rooms.
- (Optional) If you want to make this setting mandatory for all users in this group, click the lock icon , and then click Lock to confirm the setting.
Enable Breakout Rooms as an End-User
To enable the Breakout Room feature for your own use:
- Sign in to the Zoom web portal.
- Click Account Management > Account Settings (if you are an account administrator) or Settings (if you are an account member).
- Navigate to the Breakout Room option on the Meeting tab and verify that the setting is enabled.
If the setting is disabled, click the toggle to enable it. If a verification dialog displays, choose Turn On to verify the change.
Note: If the option is grayed out, it has been locked at either the Group or Account level, and you will need to contact your Zoom administrator. - (Optional) Click the checkbox to allow meeting hosts to pre-assign participants to breakout rooms.